Retro-Glam Valentine’s Day Hair

Valentine’s Day is this Friday! What do you all have planned? If you have a special date or Galentine’s GNO we have the perfect hair tutorial for you today.

V Day Hair 2

You need a curling Iron, comb, brush, metal clips, bobby pins (optional), argan oil or serum (optional), and hairspray.

V Day Hair 3

Start by parting your hair where you would like to wear it. A deep side part looks best. Then section off the sides from the back.

V Day Hair 4

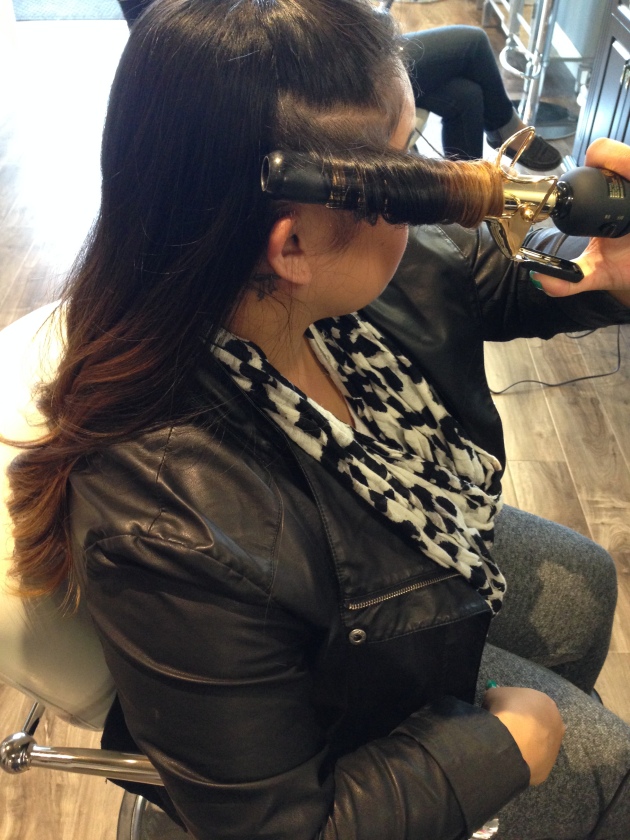
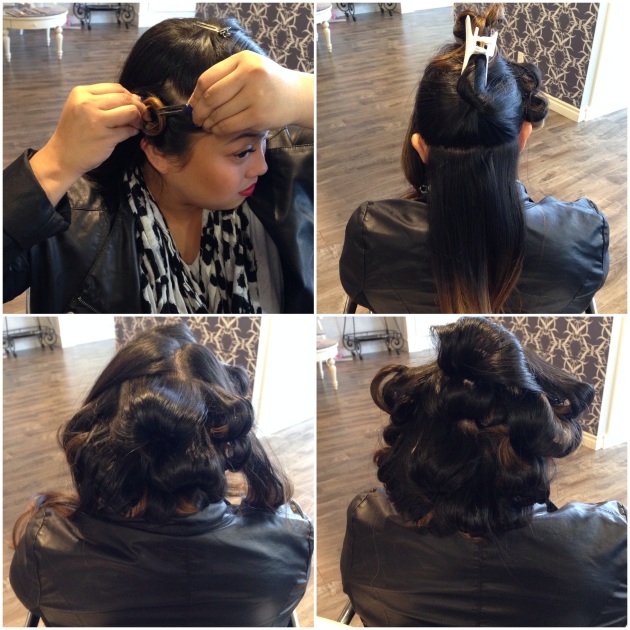
Take a 1-2 inch section and curl that section starting from the top working your way down to the bottom.

V Day Hair 5

Make sure to keep the curling iron horizontal. The key to this style is curling all the hair in the same direction.
V Day Hair 6

Once you complete a curl, wind it up and clip it with a metal clip, keeping the curl horizontal. Continue around the head until all the hair is curled and clipped.

V Day Hair 7

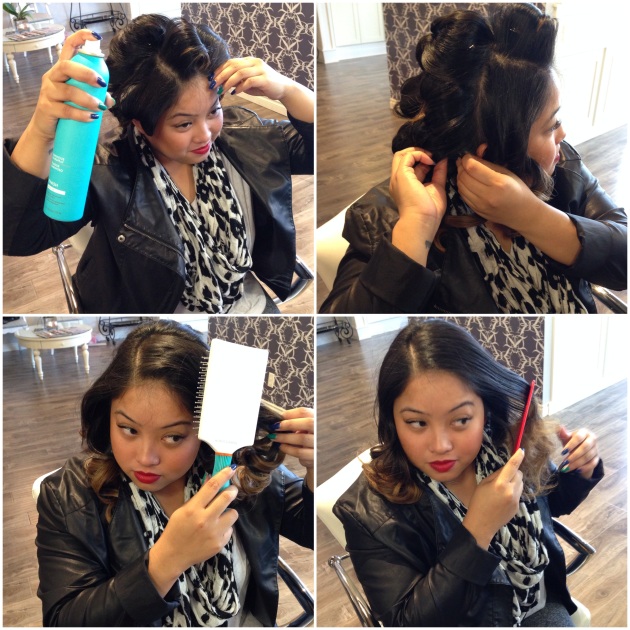
Spray with hairspray and let the curls cool down. Once cooled let all the hair down and brush the curls together. Add a drop or two of argan oil and work through the mid shaft and ends if you would like. Finish with a wide toothed comb until you notice the curl pattern forming. It should start to look like a loose S wave.
V Day Hair 8

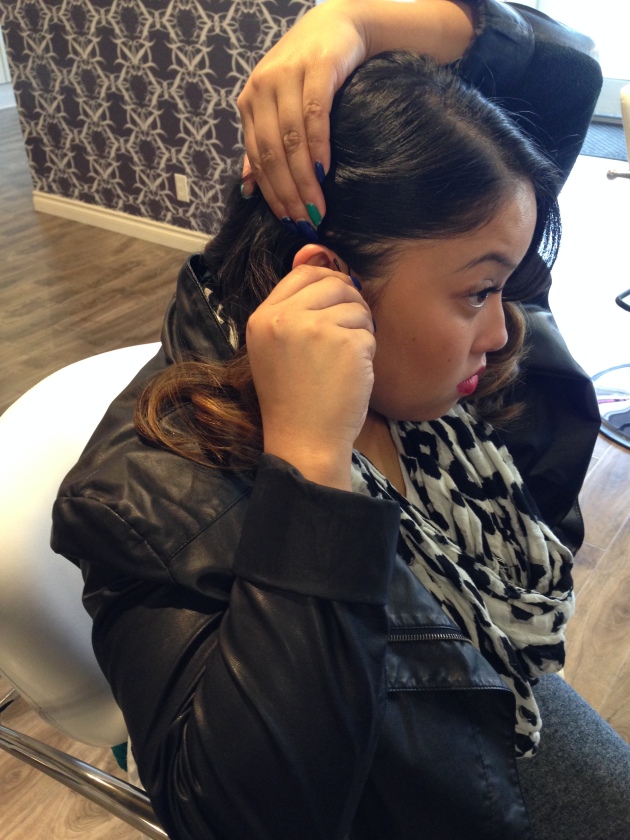
Smooth your light side down and pin just behind the ear with bobby pins.

V Day Hair 9
Finish off with another spray of hair spray and you’re good to go.

IMG_6840 (2)

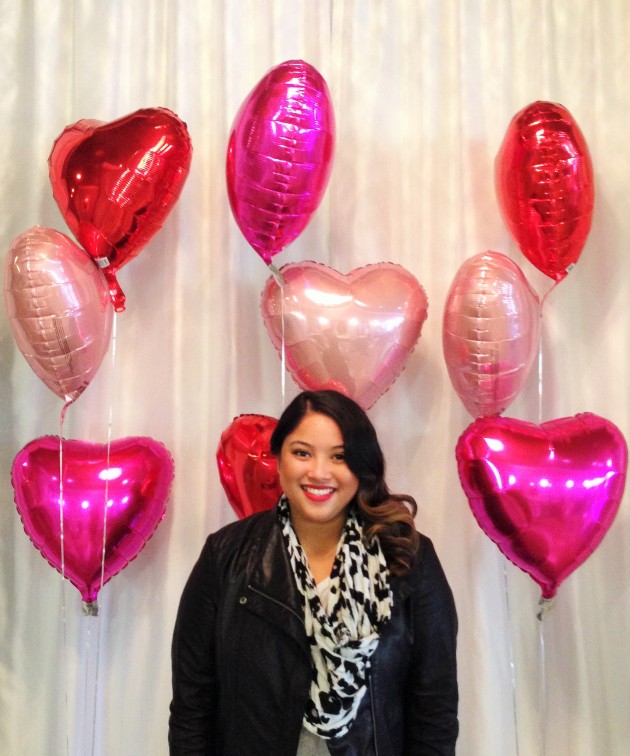
Thanks to L Beauty Bar for letting us use your beautiful salon. If you’re in the Seattle area, be sure to check them out! Hope you all have a great Valentines Day filled with happiness and love!

Fashion Swap

Hello Everyone!

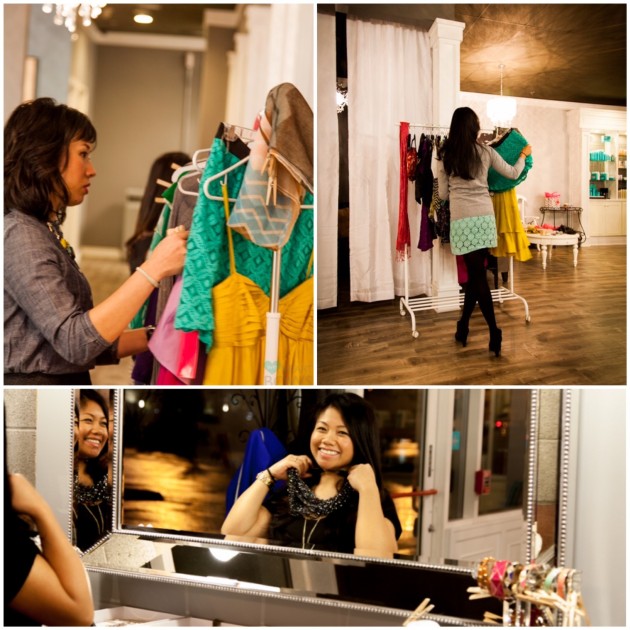
Hope you all had a wonderful start to the year! Today we are sharing a party we threw for two of our ladies here at We Heart Bows, Cherry and Clarissa. As fashion lovers, we decided it would be fun host a fashion swap party for the two birthday girls.  What a great way to get rid of clothing and accessories we were tired of and swap them for new things to refresh our wardrobe.

Our wonderful friend Loan offered her beautiful new salon as a venue. We found some great ideas on Pinterest and decided to make it Kate Spade inspired. We started off with a bright pink, black, white and gold color scheme. Paperless Post had the perfect Kate Spade New York invitations, pink and gold topped with a bow, of course. Here are some photos and details of the event. Enjoy!

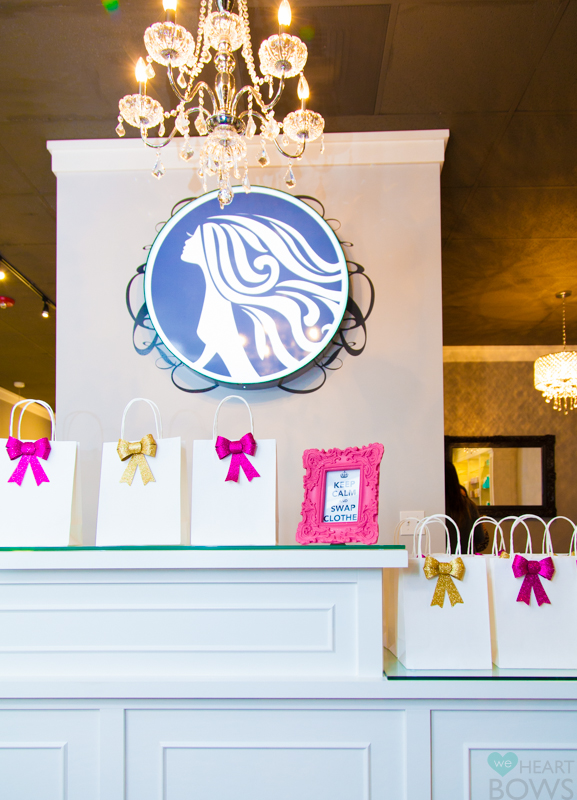
FS_1Venue: L Beauty Bar/ DIY shopping bags

FS_2Sips/ Treats /DIY Paper flowers/ DIY favor poppers

FS_3The guests were asked to bring 5 items and were given clothespins with their initials to pin on the items they wanted.

FS_4Drawings were held for items with more than one pin.

ClothesSwapParty-45

Happy Ladies with their full shopping bags.

We had so much fun putting this together. Everything turned out so beautifully. Special thank you to our guests and L Beauty Bar. Thanks for stopping by and hope you are inspired to host a fashion swap with your friends!

Wrap Party 2013

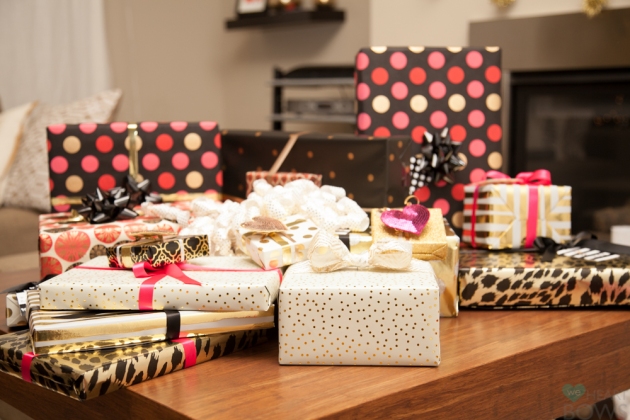
All of us ladies got together last night and had our first ever gift wrap party.  We decided it would be a fun way to celebrate the holidays with each other, exchange our gifts, and get all our gift wrapping done.  It was so much fun we decided it would be our yearly tradition.

wrap_party_0

wrap_party_1

We combined all our wrapping supplies and we had a great assortment of pretty wrapping paper, fabric and curling ribbons, and bows. We even used parts of our gifts to top the presents. Hair accessories make the prettiest gift toppers like these heart hair clips from shop bando.  We also found the perfect free downloadable gift tags here, that we printed on card stock and cut out.

GiftWrapping2013-22

GiftWrapping2013-30

We claimed our corners of the table and proceeded to make a beautiful mess.

wrap_party_2

wrap_party_3

Our expert gift wrapper Cherry showed us the best way to perfectly wrap presents in boxes.

1.  Start by ensuring you have enough paper to cover half way up the shortest widths (the ends of the box).

2.  Next make sure you have enough wrapping paper to cover around the box and tape with a little bit of paper covering the top.

3.  Wrap the paper around all sides of the box and crease the edge.

4.  Fold the excess paper under right along the edge that you creased. wrap_party_4

5.  Crease the sides of the ends towards the middle.

6.  Form the top into a triangle and fold cleanly.

7.  Tape the top triangle and do the same with the bottom.

8.  Finish the gift off with a ribbon, bow, or any gift topper you like. Here Cherry used a fabric ribbon attached a tag and tied a pretty bow!

wrap_party_5

wrap_party_6

Wrapping your gifts is so much more fun with friends! From our families to yours we wish you all a very Merry Christmas filled with pretty wrapped gifts!

wrap_party_7

DIY Clutch

PicsArt (1)

Hello everyone! Here is a fun DIY project we did a little while back. We were inspired by Gucci and all of the monogrammed purses and clutches we’ve been seeing in stores and online. We found these awesome and inexpensive clutches from Forever 21 and decided to make our own. This would also make a great gift. Who doesn’t love something personalized? Forever 21 seems to be sold out of the clutches online so check in stores, and American Apparel also has a great selection of real leather pouches. Give it a try this weekend if you’re feeling crafty!

1. Start with a plain clutch, some acrylic paint, brushes, sponge applicators, painters or washi tape

2. Tape off the area you would like to paint. We decided to do stripes so measure equally on both sides to make it centered.

3. Start painting making sure to do thin coats to prevent bleeding. You’ll need about 2 to 3 coats for each color. Make sure the paint is completely dry before you tape off again for additional stripes (f you do this, be very careful, the paint can peel off if you do it too soon). We used a hair dryer on the cool setting to speed up the drying process.

4. For the monogram we made a custom stencil based it off of this tutorial. We printed out different sized letters in plain, bold font. Tape painters tape or washi tape over it and cut out the letters with an X-Acto knife. Carefully peel off the tape from the paper and use the tape as your stencil. This didn’t work that well for some of us. So we tried doing it free hand and some different stencils from the craft store.

5. Let the paint dry completely and you have your finished clutch!

TIP: Use a baby wipe or alcohol pad if you mess up. It comes right out!

Check out our Instagram to see how we finished off our clutch with a little extra something.

What to Wear for Thanksgiving

Thanksgiving Plaid - 1

Tomorrow is Thanksgiving! I don’t know about you but I kind of obsess over what I’m going to wear on a daily basis, what more if it is a holiday?  On Thanksgiving one thing is for sure, you eat a lot.  My family loves to cook and I can be sure there is a ton of awesome, delicious food for Thanksgiving dinner.  And when I think about that I’m more than tempted to wear sweatspants.  However, I will resist that temptation.  This year I’m hoping to mix a little comfort with of course style.  See my picks above for the perfect comfortable but chic Thanksgiving outfit!  Happy Thanksgiving all! We hope your holiday is filled with time spent with people you love and of course food!!!
-Clarissa

Crown Braid Tutorial

CrownBraidTutorial-1

Here is another fun braid tutorial for you! This is just one take on a crown braid and it works best on medium to long hair. It is easier to do on someone else, so invite a friend over and have a braid party or if you’re more advanced with braiding, give it a try on yourself.

1. Start with dry hair with some wave or curl. Spray some dry shampoo throughout if you like. (the texture helps the braid stay in place)

2. Part hair where you would like to wear it. Start on your heavy side, or either side if you part in the center.

3. Begin an inside french braid (where the hair crosses over instead of under). Continue down to the other side of the head making sure to follow the head shape.

4. When you can no longer add hair, finish off the braid and secure with an elastic.

5. Cross the tail over to the other side and place behind the start of the french braid.

6. Hide the end underneath the other side of the braid and pin with bobby pins.

7. Once you’re happy with the placement, pull apart sections of the braid to add volume and texture.

8. Secure with a few bobby pins around the braid and finish with hairspray.

Happy braiding everyone! Hope you all have a wonderful Thanksgiving holiday!

3.1 Phillip Lim for Target

Phillip Lim for Target is launching this Sunday and we can hardly wait! You know we love a good designer collab and we’ve been looking forward to this highly anticipated collection with Target for months. We’re especially excited for the bags and hope we can get our hands on a few of those beautiful babies. Here are just a few of our favorite items.

Phillip Lim + Target
From top, left to right: grey knit top with frill / tote in cobalt blue / cross body purse in black / shirt dress in paper floral print / leather jacket in black / mini satchel in gold

Will you be shopping this weekend? Check our Instagram this Sunday for our Target haul! Have a great weekend everyone!

Shop the collection on Sunday here.

We Heart Deals + Shoes | Blogger Favs

If you love following fashion blogs and bloggers as much as we do, you’ll easily recognize the following pairs of shoes. We heart the look of these shoes and are mildly obsessed. But as much as we wish we had an unlimited shoe budget, its sometimes hard for the average girl and mama to pull the trigger on these coveted fashion blogger favs. (Of course unless it’s your birthday). We here at We Heart Bows hope to show you awesome finds that don’t need to break the bank:

We Heart Deals + Shoes | Blogger Favs

Falling for Emerald Green

It’s hard to believe that fall is just around the corner! Kids are going back to school and today we got a taste of cooler weather (big ick to the rain) after enjoying an awesome sunny weekend in the pacific northwest. To help us get ready for the change of seasons we want to share our current color obsession. Coincidentally, it happens to be the pantone color of the year; emerald green. Here are a few of our favorite emerald green things:

Falling for Emerald Green

From top, left to right:  Zara Floral Jumper / Alexander Wang Rocco Duffel / Eddie Borgo Tassel Earrings / Dolce Vita Contrast Pumps

We Heart Blowouts + Designer Collabs

Hello everyone! Apologies for the lack of posts on the blog. Its been a fun and crazy busy summer for us so far. We’re slowly trying to get back into the swing of things and appreciate you sticking with us. We’re working on bringing you more beauty, fashion, and lifestyle and hope you stay tuned.  From everyone here at We Heart Bows, we greatly appreciate your continued love and support!

Today we’re sharing a fun outing filled with blowouts and shopping. Who doesn’t love getting pampered along with some retail therapy, especially when it’s with their favorite girl friends?!  We recently went to a local blow out bar, Salon Maison and checked out a new designer collaboration with  Joe Fresh + JCP. We fell in love with their kids line, so stylish and affordable. Perfect timing for back to school. Here are some of our favorite photos and our picks from the line.

wpid-PicsArt_1377293410210.jpg

Joe Fresh Girls
From top, left to right: Striped Sleeveless Top / Chambray Shirtdress / Twill Jacket / Faux Leather Jacket / Batwing Top / Tres Chic Top / Floral Print Jeans / Star Tutu Skirt / Print Leggings
Joe Fresh Boys

From top, left to right: Graphic Sweater / Taffeta Vest / Reversible Tee / Motorcycle Jacket / Skull Print Shirt / Belted Jeans / Sweat Pants / Shawl-Collar Cardigan / Short-Sleeve Woven Shirt

FYI, many of the items are on sale or have been put on clearance. Happy shopping and have a great weekend!